
If you're used to buying songs, movies, e-books, and other media from the iTunes store, your computer would be getting full and become slower and slower with the increasing media files added to iTunes library; and in order to protect your iTunes library in case of data loss, it's better to backup your iTunes library. Here, we’ll show you how to backup the iTunes library to an external hard disk and how to transfer iTunes music & Apple Music tracks to an external hard drive.

Method 1: Backup iTunes Library to External Hard Drive
Method 2: Backup iTunes Music to External Hard Drive with A Third-party Software
To ensure that you copy everything from iTunes over to an external hard drive, you should first consolidate your library. Even if you think your library has all your information consolidated already, it can't hurt to do a manual check before moving any data.
Step 1 Find iTunes Advanced Preferences:
To consolidate iTunes library, on your Windows, launch iTunes > go to "File" > "Library" > "Organize Library" > tick "Consolidate files" > click "OK".
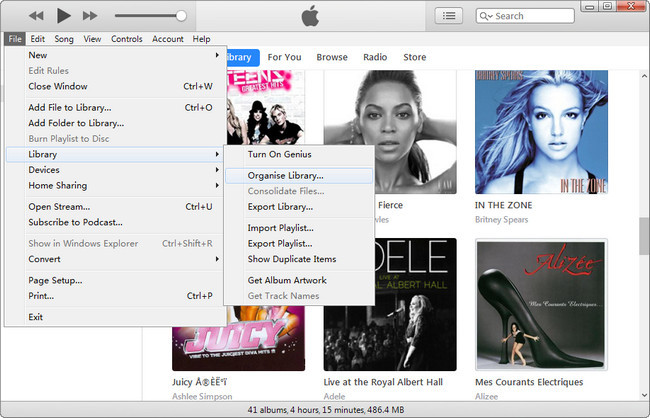
After completing these steps, your iTunes library files are all in one place and are ready to be backed up to your external hard drive.
Step 1 Quit iTunes and connect your external hard drive to the PC via USB.
Step 2 Go to "Edit" and select "Preferences". In the Preferences window, select Advanced. And check "Keep iTunes Media Folder Organized" and "Copy files to iTunes Media folder when adding to library."
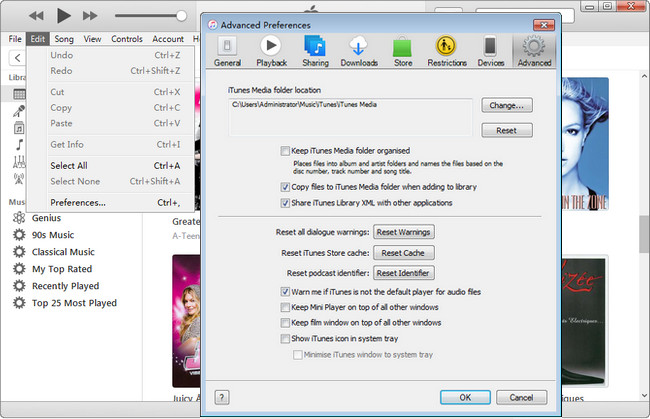
Step 3 In the same panel, click "Change" and you are guided to select a new folder in your external drive for you to store the iTunes library.
Step 4 Drag the iTunes folder to your external hard drive. This will begin the iTunes backup. The amount of time the backup will take depends on the size of your library. When the transfer is done, your backup is complete and your external hard drive can be disconnected.
Step 5 After the transfer process is complete, your iTunes library has been successfully transferred to your external hard drive.
From the above-mentioned part, you probably have felt a little complicated to move the iTunes library to an external hard drive. If you also need to backup your iTunes M4P music and Apple Music to an external hard drive or a new computer, you'll need to remove restrictions from these files firstly.
Sidify Apple Music Converter is an excellent all-in-one iTunes Audio Converter that is capable of converting Apple Music tracks, iTunes M4P music, and iTunes Audiobooks to MP3, AAC, FLAC, WAV, AIFF and ALAC format, thus you can transfer all your iTunes music to an external hard drive. In the following, we'll guide you to use Sidify Apple Music Converter to convert iTunes music & Apple Music and transfer them from PC to an external hard device.

Sidify Apple Music Converter

If you are looking for a tool to convert any streaming music (such as Spotify, Apple Music, Amazon Music, Tidal, Deezer, YouTube, YouTube Music, SoundCloud, DailyMotion …) to MP3, Sidify All-In-One is the go-to choice.
* If you don't see the "Choose Conversion Mode" option in Step 1, please check this page for more detailed instructions.
Step 1Choose Conversion Mode.
Launch Sidify Apple Music Converter, and you'll need to choose one conversion mode to start: Apple Music App or Apple Music Webplayer. (>> App Mode vs Webplayer Mode)
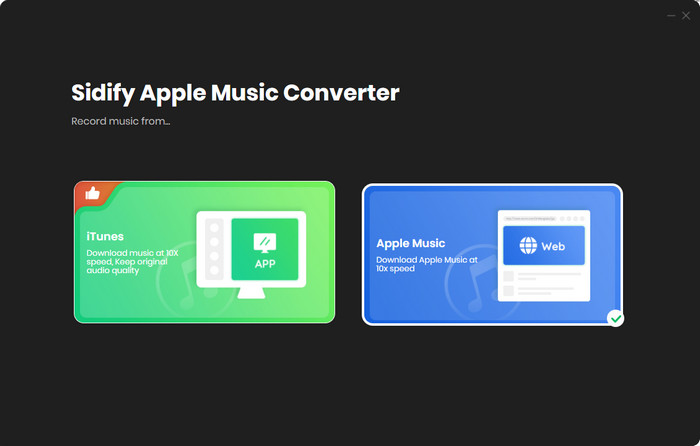
Select the Apple Music app mode to access the modern interface of Sidify:
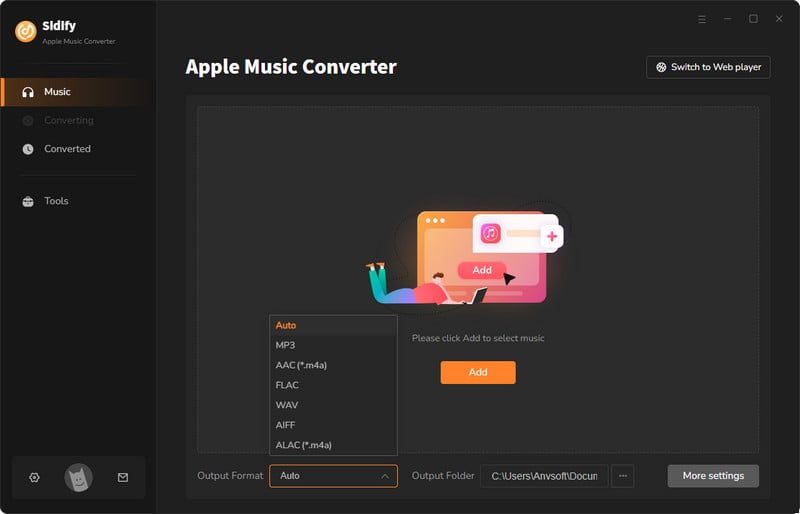
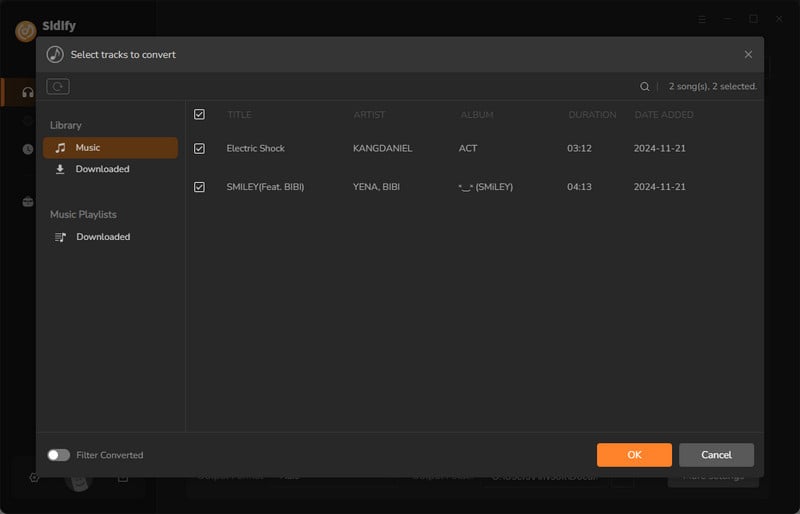
Step 2Add Apple Music Tracks to Sidify.
Drag and drop songs, an album or a playlist from Apple Muisc to Sidify. Or you can click the "Add" button on the interface and copy & paste the URL of your Apple Muisc to the program. Then click the "OK" button to import them to Sidify.
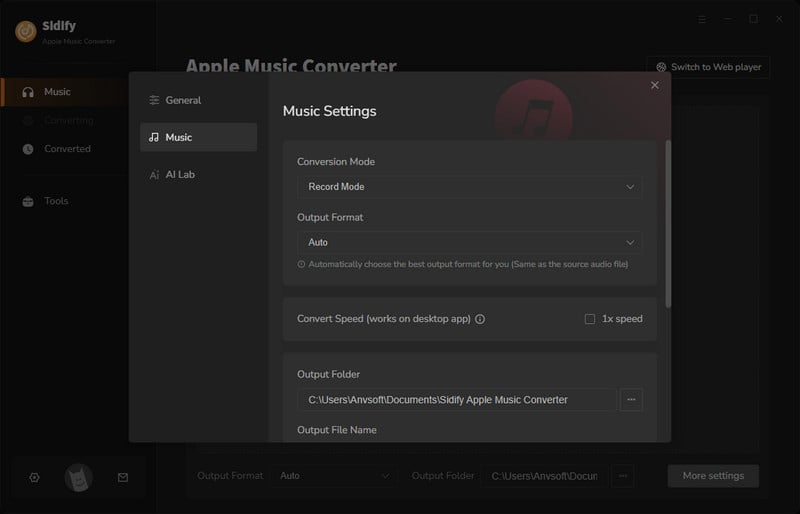
Step 3 Choose Output Format and Customize Output Path.
Click the "Settings" icon in the left panel. Here you can choose the output format (MP3/AAC/WAV/FLAC/AIFF/ALAC), the output quality and the output path as well. Besides, you can customize how you'd like to name and sort out the converted files.
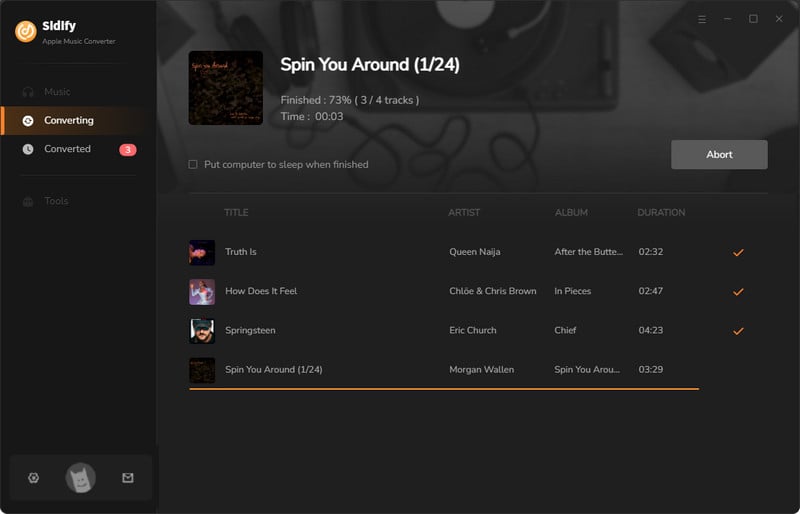
Step 4 Convert Apple Music to MP3.
Click the "Convert" button and Sidify would immediately start converting the Apple Music to MP3s.
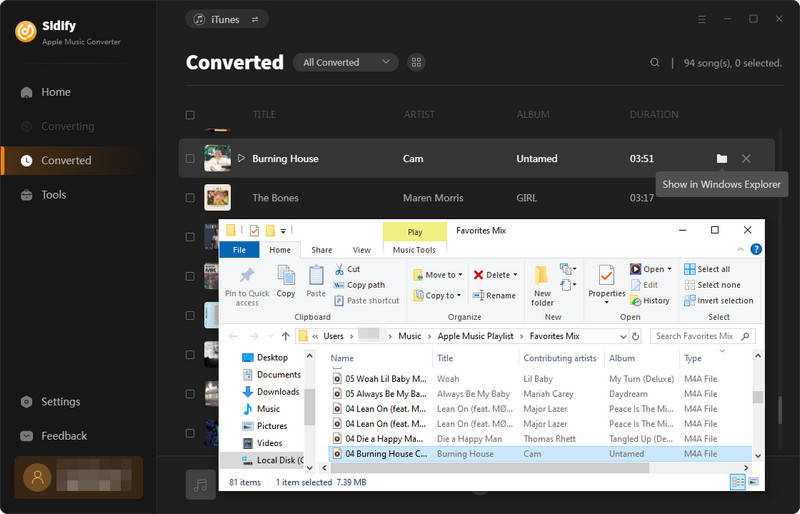
Step 5 Find the MP3 downloads on the Local Drive.
Once the conversion is done, click the "Converted" tab and you can check all the Apple Music that have been converted successfully. Go to the output folder set in the previous step, you'll find the downloaded MP3s.
Step 6 Transfer Converted iTunes Music from Computer to External Hard Disk
Now, all of iTunes music and Apple Music tracks are converted to common audio tracks and you can directly transfer all of iTunes files from the computer to your external hard disk.


