When it comes to music apps, most of the talk are about the two on-demand music streaming services -- Spotify and Apple Music. Although Spotify came much earlier than Apple Music with a large portion of fans supported, the newer music service has quickly won the popularity. And more and more Spotify users are trying to figure out the best way to export their playlists from Spotify to Apple Music. Unfortunately, there’s no easy solution for this dilemma, but don’t worry — you won’t have to manually recreate every single playlist if you don’t want to.
After comparing and contrasting various methods, we've found there are two fairly reliable third-party tools that could save lots of your hours if you have dozens of playlists that need to be moved. One is called Sidify Music Converter, and the other is called Move to Apple Music.
Price: Free for limited use, $14.95/ month for Professional Version
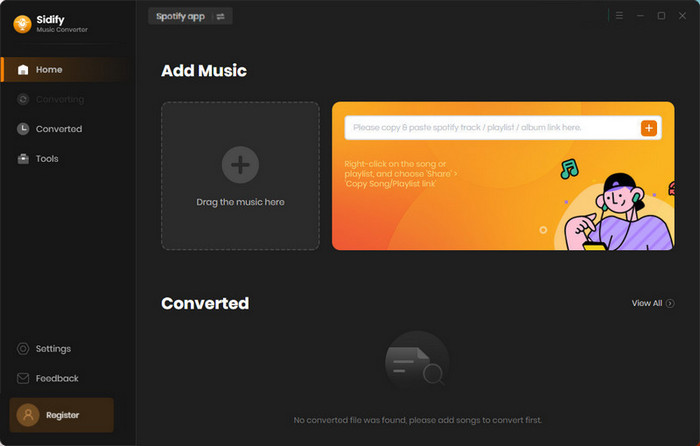
Apple Music allows you to create new playlist to enjoy your favorite music, but it cannot directly import playlists from Spotify. Just like most streaming services, Spotify music also adds a DRM (Digital Rights Management) layer to its streaming music. If you have any music in Spotify that are not available in Apple Music and you would like to add them on your Apple Music playlist, Sidify Music Converter is an application that can help you download Spotify Playlist to plain formats on your computer and then transfer playlists from Spotify music to Apple Music.

If you are looking for a tool to convert any streaming music (such as Spotify, Apple Music, Amazon Music, Tidal, Deezer, YouTube, YouTube Music, SoundCloud, DailyMotion …) to MP3, Sidify All-In-One is the go-to choice.
Step 1. Choose Conversion Mode
Step 2. Open your Spotify and log in with your Spotify account.
Step 3. Drag & drop playlist from Spotify to Sidify Music converter.
Step 4. Adjust output format, conversion speed and output path, etc.
Step 5. Click the "CONVERT" button to start conversion.
Step 6. Manually Import converted Spotify playlist to iTunes library: Open iTunes, go to Menu bar and find "File -> Library -> Import Playlist" to import the Spotify playlists strored on your local computer.
Price: Free for limited use, $4.17 for Premium, $249 for Lifetime
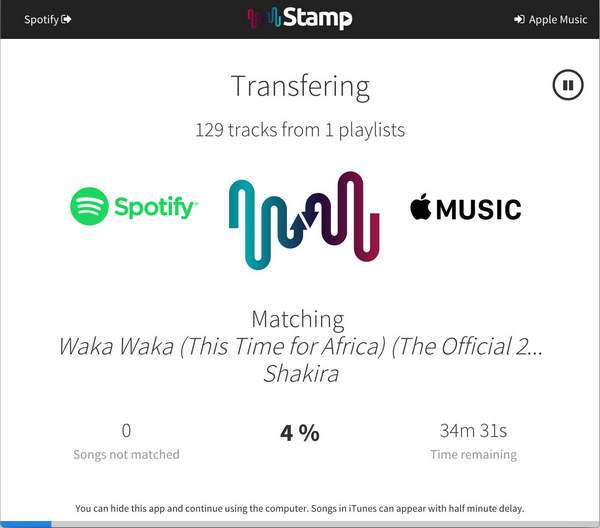
The second method is a manual process to transfer your songs from Spotify to Apple Music– Stamp. Stamp is the most feature-packed service to use if you want to transfer your playlists and songs from one streaming service to another. You can use it on both desktop platforms and iOS, but we would suggest the desktop app since the iOS app causes more headaches than it’s worth.
Step 1. Before you begin, export your Spotify playlists as .csv filed using Exportify
Step 2. Click on Get Started.
Step 3. Log in or Sign up for Spotify to export your playlists as .csv files.
Step 4. Next, go to the STAMP website and download the app
Step 5. Open STAMP App and select the .csv file you want to import
Step 6. Click parse and wait for the application to finish importing
Step 7. Click “Next” and then it would start transfering your Spotify playlist. It will take time to detect and transfer songs and you may experience slowness on your Mac during this process.
If you’re making the jump from Spotify Playlists to Apple Music, a useful workaround is essential. Compared with Stamp, Sidify Music Converter does a much better job with just few easy clicks. It helps you remove DRM from Spotify music using a Mac-or-Windows based machine, allowing you to access your content on a variety of devices. Moreover, the application allows for batch conversions and adjustments to settings such as output quality and output file name, making the program suitable for more than just stripping DRM restrictions.

Hanna Ellis | Content Writer
Important Notes
Sidify strictly complies with the US copyright regulations. We adopt a leading technology to record the unencrypted audio data which is outputted to the system sound device, with the highest quality.
What You Will Need
They're Also Downloading

You May Be Interested In

Hot Tutorials
Topics
Tips and Tricks
What We Guarantee

Money Back Guarantee
We offer money back guarantee on all products

Secure Shopping
Personal information protected by SSL Technology

100% Clean and Safe
100% clean programs - All softwares are virus & plugin free