
"I'm not able to use some of the music I've downloaded from iTunes. Why is that? An example file name is "track01.m4a" which was downloaded from iTunes. The error message reads: "file format not supported" is there a way I can re-format it so that Premiere Pro will accept it? Or anything else I can do to use the music I've downloaded from iTunes into Premiere Pro?"
Now, a large number of people like to add background music or video clips to their video project with Premiere to make the video more appealing, while some have problems on importing iTunes purchased music/video to Premiere Pro. What's the problem? Well, that's because most of iTunes files are protected M4P/ALAC songs or protected M4V files, while Premiere Pro mainly supports inserting 20+ video formats such as .MP4, .MOV, .AVI, .3GP, .MTS/M2TS, .DV, .ASF, etc. and 10+ audio formats such as .MP3, .AAC, WAV, .AIFF, .M4A, .WMA, .AVI ASND, etc.
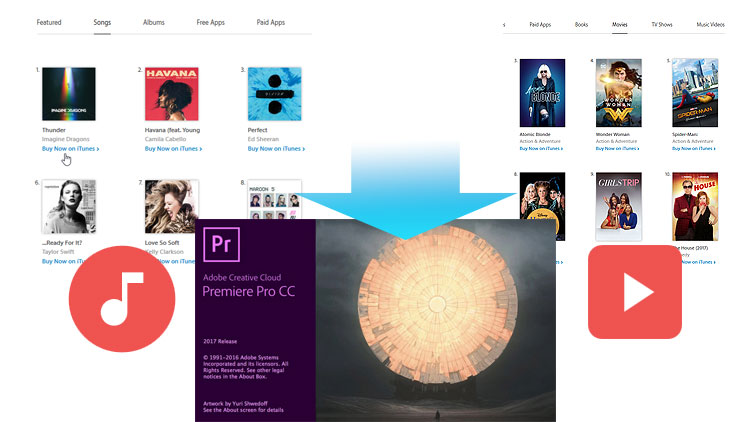
To add iTunes-protected M4P, ALAC, or M4V files to Premiere Pro, what you need is the iTunes Video/Music converters that can remove DRM from iTunes music/Video and convert them to Premiere Pro supported formats like MP3 or MP4 first. Check out this post to learn about how to import iTunes music and movies files to your Premiere Pro.
Part 1: Import iTunes M4P/ M4A Music to Adobe Premiere Pro
For decrypt music from iTunes music including Apple Music and purchased M4P music, an all-in-one tool known as Sidify Apple Music Converter will be of great utility to you. As Sidify Apple Music Converter makes it easy to convert Apple Music tracks and iTunes music to regular MP3 formats, so that you can easily import iTunes music to Premiere Pro.
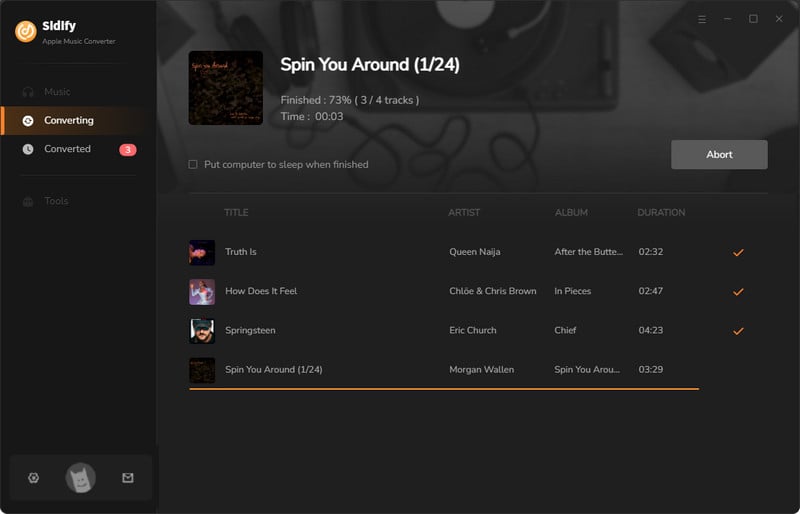
Run Sidify Apple Music Converter, you will access the modern interface of the program.
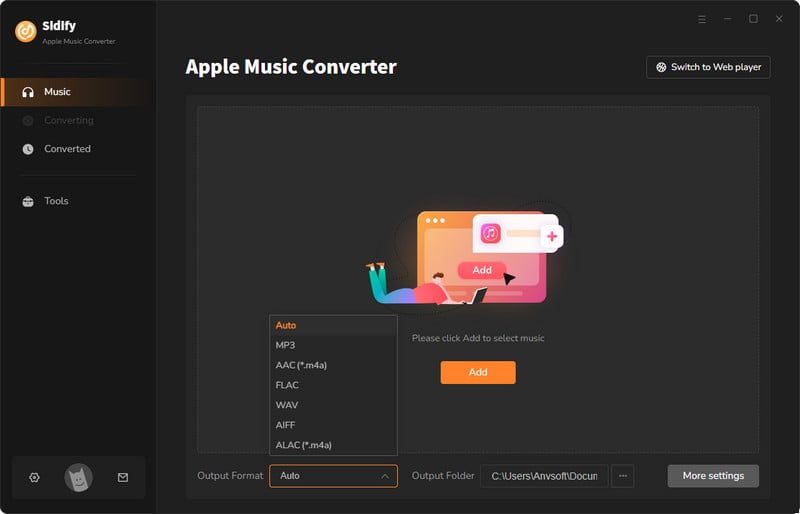
Before adding music, please sure all your iTunes music tracks are well-downloaded to your local computer.
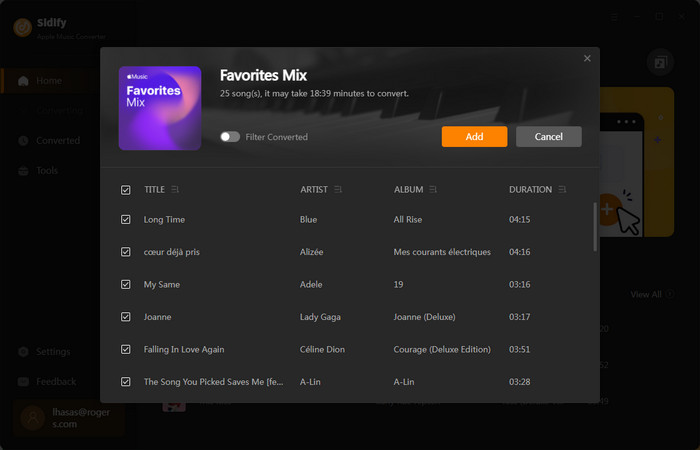
Drag and drop the song and the playlist you want to download to the Sifify. Sidify will automatically recognize and list the songs in the playlist.
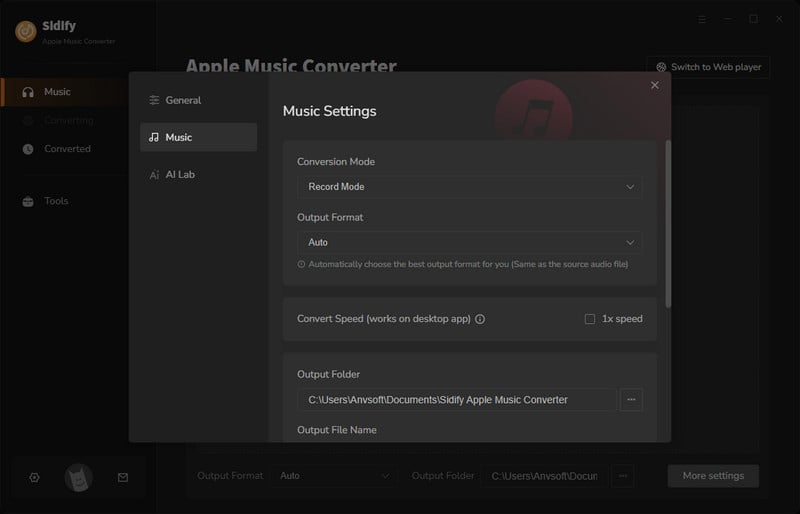
Click on the Settings part in the bottom left corner.
![]() Tip 2: Here you can choose the output formats (MP3, AAC, WAV, FLAC, AIFF, ALAC), Bit Rate(128kbps, 192kbps, 256kbps, 320kbps), output folder, and how you like the audio files to be organized, and so on.
Tip 2: Here you can choose the output formats (MP3, AAC, WAV, FLAC, AIFF, ALAC), Bit Rate(128kbps, 192kbps, 256kbps, 320kbps), output folder, and how you like the audio files to be organized, and so on.
![]() Tip 3: To help you organize the music library after finishing downloading, the Sidify program supports saving the output audio into Artist, Album, Artist/Album, or Album/Artist folder for meeting various users' needs.
Tip 3: To help you organize the music library after finishing downloading, the Sidify program supports saving the output audio into Artist, Album, Artist/Album, or Album/Artist folder for meeting various users' needs.
Ready? Click on the Convert button to start converting Apple Music songs to the plain audio format. After the conversion is completed, you can click on the Converted tab to check the well-converted Apple Music songs.
Finally, launch Adobe Premiere Pro and directly drag and drop the music file into the Project panel, and the music file will be available to use in your project.
Here M4VGear DRM Media Converter is strongly recommended to remove DRM from iTunes M4V video to get them compatible with Premiere Pro. Now, you can just get the free trial version of M4VGear and follow the easy steps to remove DRM from your iTunes M4V movies to plain MP4 video for importing to Premiere Pro.
Firstly, Download and install M4VGear on your computer.
Note: Please also make sure your iTunes is well-installed.
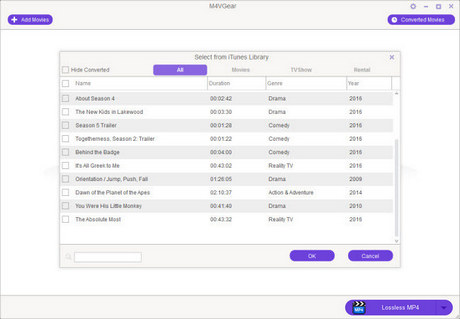
Launch M4VGear, click the "Add Movies" button on the upper left, a pop-up window would display all your iTunes purchases and rentals, including movies, TV shows, and music videos. Or directly drag and drop iTunes M4V videos to M4VGear main interface.
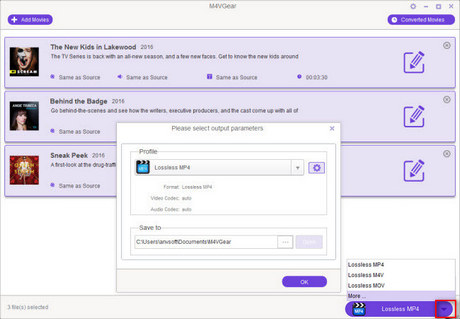
If you need to change the output format or output directory, you can click the small icon next to "Lossless MP4" to change the output format. There are various output formats for you to choose from.
![]() Tip 1: Output format as "Lossless MP4" is highly recommended, which enables users convert at 20 times faster speed while keeping Dolby 5.1 audio track and all subtitles.
Tip 1: Output format as "Lossless MP4" is highly recommended, which enables users convert at 20 times faster speed while keeping Dolby 5.1 audio track and all subtitles.
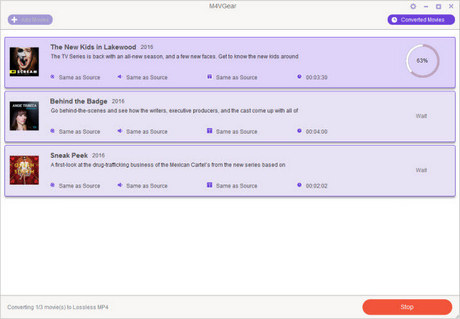
Click the output profile button to begin converting iTunes M4V movies to MP4 format supported by Premiere Pro.
After conversion, you can click the "Converted Movies" button to find the converted video files.
Now, your iTunes movies are DRM-free files, and you can directly import them to Adobe Premiere Pro.
Adding music will instantly make any video more interesting. If you are looking for a tool to extract high-quality soundtracks from Spotify for putting to your video project in Premiere Pro, you could use third-party software, such as Sidify Music Converter. The process is simpler than you would think. As Sidify Music Converter supports downloading and converting music from Spotify songs/albums/playlist to plain MP3, AAC, WAV, FLAC, AIFF or ALAC files.
Sidify Music Converter

If you are looking for a tool to convert any streaming music (such as Spotify, Apple Music, Amazon Music, Tidal, Deezer, YouTube, YouTube Music, SoundCloud, DailyMotion …) to MP3, Sidify All-In-One is the go-to choice.

Hanna Ellis | Content Writer

 950,000+ Downloads


