
Sidify Amazon Music Converter
What will happen if you cancel Amazon Music Unlimited? Can you still access Amazon Music? Can those downloaded Amazon Music be listened to offline? Will the original Amazon playlists still exist if you re-subscribe at a later date? Next, we are going to give you the answers one by one. Besides, you’ll learn methods to cancel Amazon Music Subscription as well as an easy way to keep playing Amazon Music after canceling your subscription.

After you cancel the auto-renewal of Amazon Music Unlimited, you can continue to access Amazon Music Unlimited until the next billing date. After then, your original songs in the Library will be grayed out, indicating that they are not available for streaming, with the playback option removed. They’ll be active again when you re-subscribe to the service at a later time.
You can cancel the subscription of Amazon Music Unlimited through a desktop or mobile browser, the Amazon Music app for Android or the iPhone Settings app if you signed up via your Apple ID.
Step 1Go to the Amazon website and sign in to your account, if you are asked to.
Step 2In the upper right of the interface, hover over Account & Lists, and choose Memberships & Subscriptions from the drop-down menu.
Step 3Click the Cancel Subscription button next to Amazon Music.
Step 4Click through the on-screen prompts to confirm cancellation.
Step 1Open the Amazon Music app.
Step 2Tap the gear-shaped Settings icon, then Amazon Music Unlimited.
Step 3In the Subscription Renewal section, tap Cancel subscription.
Step 4Tap Submit and confirm cancellation.
You can’t cancel your Amazon Music subscription via the iOS app, but you can use your mobile browser to cancel your subscription or go through Settings if you subscribed via the App Store or your Apple ID.
From your mobile browser:
Step 1Go to the Amazon website and sign in to your account, if you are asked to.
Step 2Tap your profile icon in the upper right of the interface, then tap your Memberships & Subscriptions.
Step 3Under Amazon Music Unlimited, tap Cancel Subscription.
Step 4Tap through the on-screen prompts to confirm cancellation.
From Settings:
Step 1Open the Settings app. Tap your name at the top of the screen.
Step 2Tap Subscriptions.
Step 3Tap Cancel Subscription next to Amazon Music, then tap Confirm.
If you subscribed through a third-party, such as a mobile service provider, contact them for further assistance.
After canceling the subscription, you will no longer be able to access Amazon Music. What if you want to listen to your favorite song sometimes? You may feel that it’s not cost-effective to renew the service for a specific song. It would be great if you could still listen to a number of your favorite songs after canceling the auto-renewal, isn’t it?
Actually, before your Amazon Music Unlimited goes expired, you can use Sidify Amazon Music Converter to save Amazon Music as MP3/AAC/WAV/FLAC/AIFF/ALAC files. They’ll be exported to your local drive, for which you can still access them even after you cancel the subscription. Without further ado, let get straight to the detailed steps:
 600,000+ Downloads
 600,000+ Downloads

If you are looking for a tool to convert any streaming music (such as Spotify, Apple Music, Amazon Music, Tidal, Deezer, YouTube, YouTube Music, SoundCloud, DailyMotion …) to MP3, Sidify All-In-One is the go-to choice.
Step 1Run Sidify Amazon Music Converter on the Computer
Step 2Add Amazon Music to Sidify.
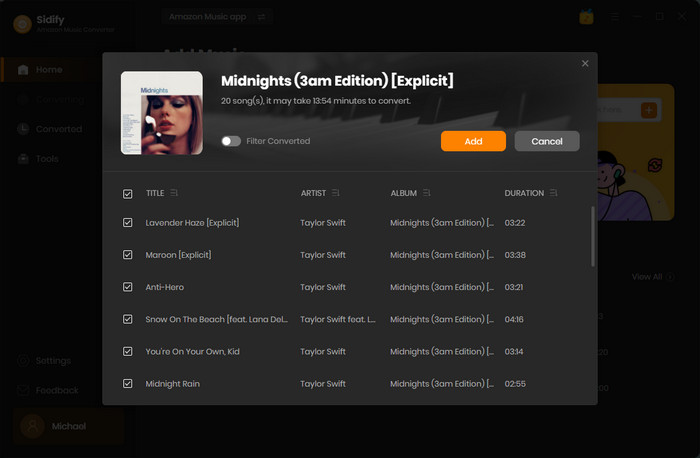
Drag and drop tracks or a playlist from the Amazon Music app into Sidify. Sidify would recognize them and list them automatically. Check the songs you want to save to your computer and then click Add.
By default, all songs are set to convert. By unchecking the first box to the left of the term "Title," all of them are de-selected, and you can then choose which songs to move to Spotify.

Step 3Customize Output Settings.
Go to the Settings section. Here you can select the output format (MP3/AAC/WAV/FLAC/AIFF/ALAC) and specify the output folder.

Step 4Export Amazon Music to the Computer.
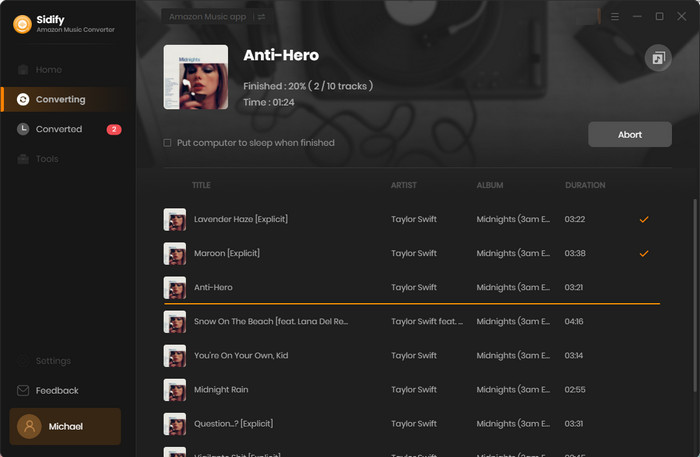
Click Convert and Sidify would immediately start exporting the Amazon Music to the customized output path.

Step 5Find the Amazon Music Downloads on the Local Drive.
Once the conversion is done, you can click Converted to check what have been downloaded successfully. Go to the output folder and you can find all the Amazon Music downloads, which you can keep playing after canceling your subscription.

Sidify Amazon Music Converter is shareware. It converts the first minute of each audio file for sample testing and needs a license to unlock the full version. You can download it for a free trial and then decide whether to get it or not.
 600,000+ Downloads
 600,000+ Downloads
What You Will Need
Amazon Video Downloader
You May Be Interested In
Hot Tutorials
Topics
What We Guarantee

Money Back Guarantee
We offer money back guarantee on all products

Secure Shopping
Personal information protected by SSL Technology

100% Clean and Safe
100% clean programs - All softwares are virus & plugin free